

Table of Contents
- Why risk management beats fancy indicators
- Supply and demand zones — the foundation
- The common mistake: entering as soon as price touches the zone
- Zone refinement: the single tweak that improves entries
- Step-by-step: refining a supply or demand zone
- Live trade example — what this looks like in practice
- Warning: do not over refine
- Applying zone refinement to crypto and multi-chain markets
- Checklist before you pull the trigger
- Final thoughts
- FAQ
- Closing
Why risk management beats fancy indicators
Risk management is the silent profit multiplier that most traders ignore until it slaps them in the face. The core idea is simple: a small, repeatable tweak to how you choose entries and stops can dramatically improve your risk-to-reward across every strategy you run. Better math equals better edge.
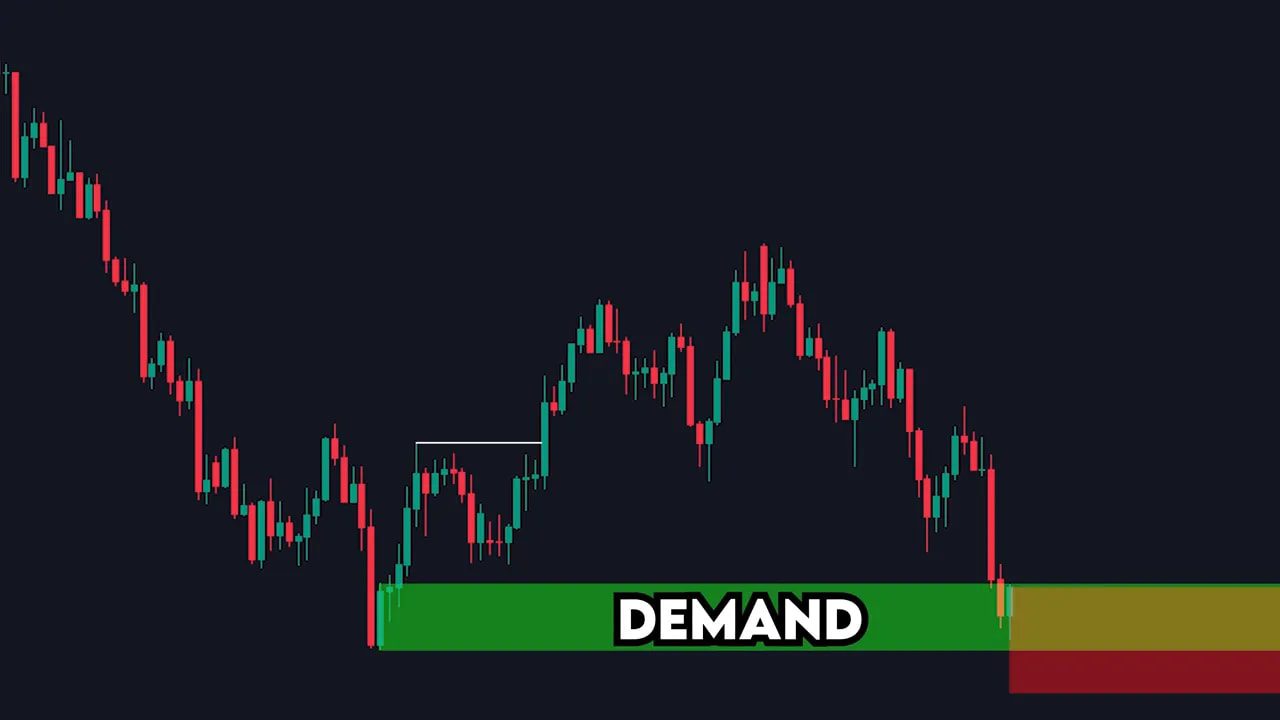
Supply and demand zones — the foundation
Supply and demand zones are where big orders pushed price and started strong moves. A single candle often marks the exact point where institutional activity accelerated a trend. Mark that candle from its low wick to its high wick and you’ve got a zone that matters.
On a chart:
- Demand — the candle that began a strong move up.
- Supply — the candle that began a strong move down.
The common mistake: entering as soon as price touches the zone
Many traders enter immediately when price touches a four hour demand or supply zone, set a stop just beyond it, and aim for the recent high or low. That approach works sometimes, but often the raw zone produces mediocre risk-to-reward numbers. Example: a setup with a 2.14 risk-to-reward—okay, but not great.
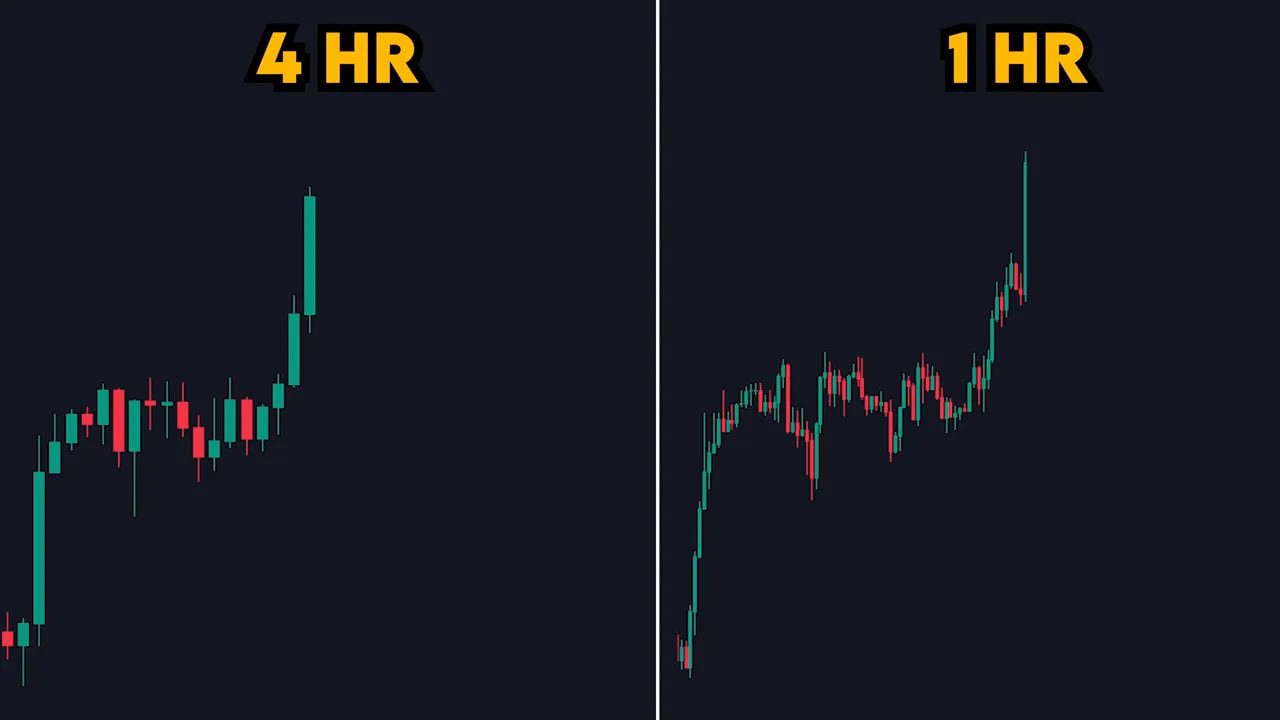
Zone refinement: the single tweak that improves entries
Instead of entering the moment price hits your four hour zone, refine that zone on a smaller timeframe. If you start on the four hour chart, drop to the one hour to find the specific candle inside the larger zone that actually marks the beginning of the move. That smaller, refined zone gives you a better entry price and a tighter stop.
Benefits of zone refinement:
- Smaller stop loss (less risk).
- Better entry price (higher potential profit per trade).
- Improved risk-to-reward without changing your target or strategy.
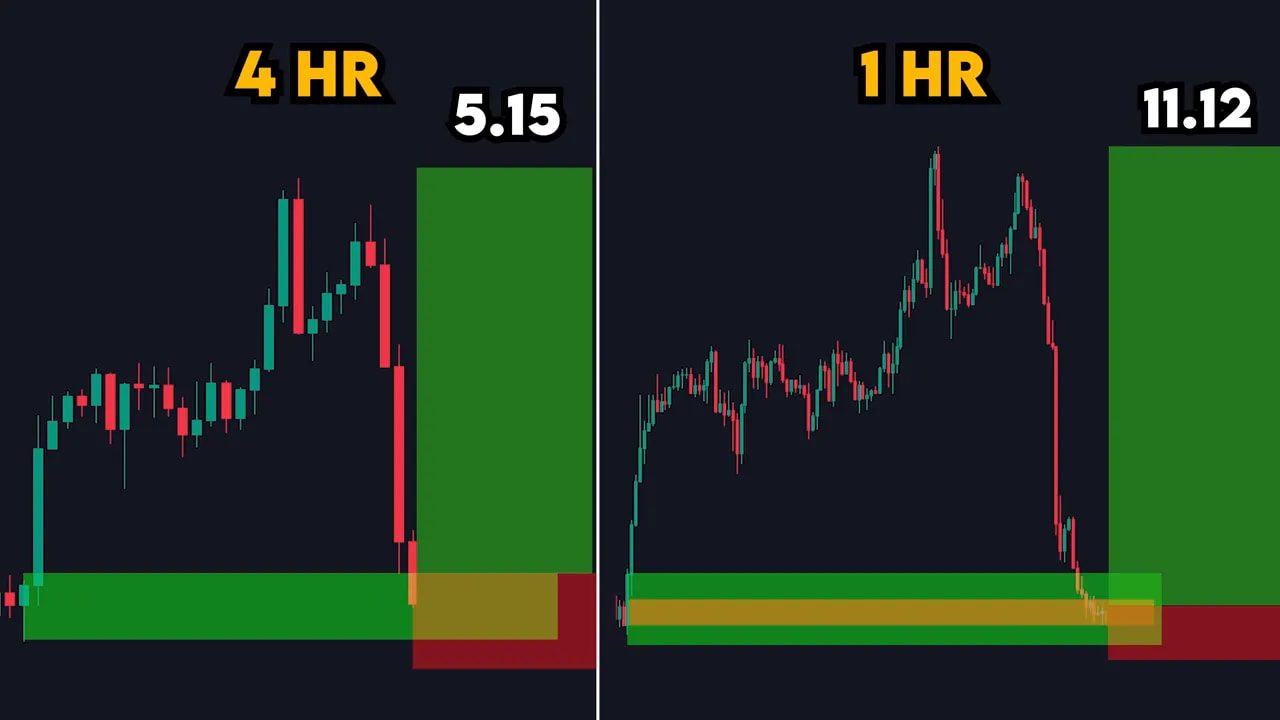
How much does it help?
In examples where the four hour zone entry showed a 5.15 risk-to-reward, the one hour refined entry produced an 11.12 risk-to-reward using the same stop and take profit logic. In another real trade example, refining from four hour to one hour improved a 5.23 risk-to-reward to 7.6 — just by choosing a better entry inside the same demand area.
Step-by-step: refining a supply or demand zone
- Start on your chosen higher timeframe (daily, four hour, 30 minute, etc.).
- Identify the candle that began the impulse move and draw the zone from low wick to high wick.
- Drop two timeframes lower (see the two steps down rule below) to locate the exact candle inside the larger zone that created the move.
- Enter when price reaches the refined zone on the lower timeframe.
- Place your stop below the refined zone and target the same high/low you would have on the higher timeframe.
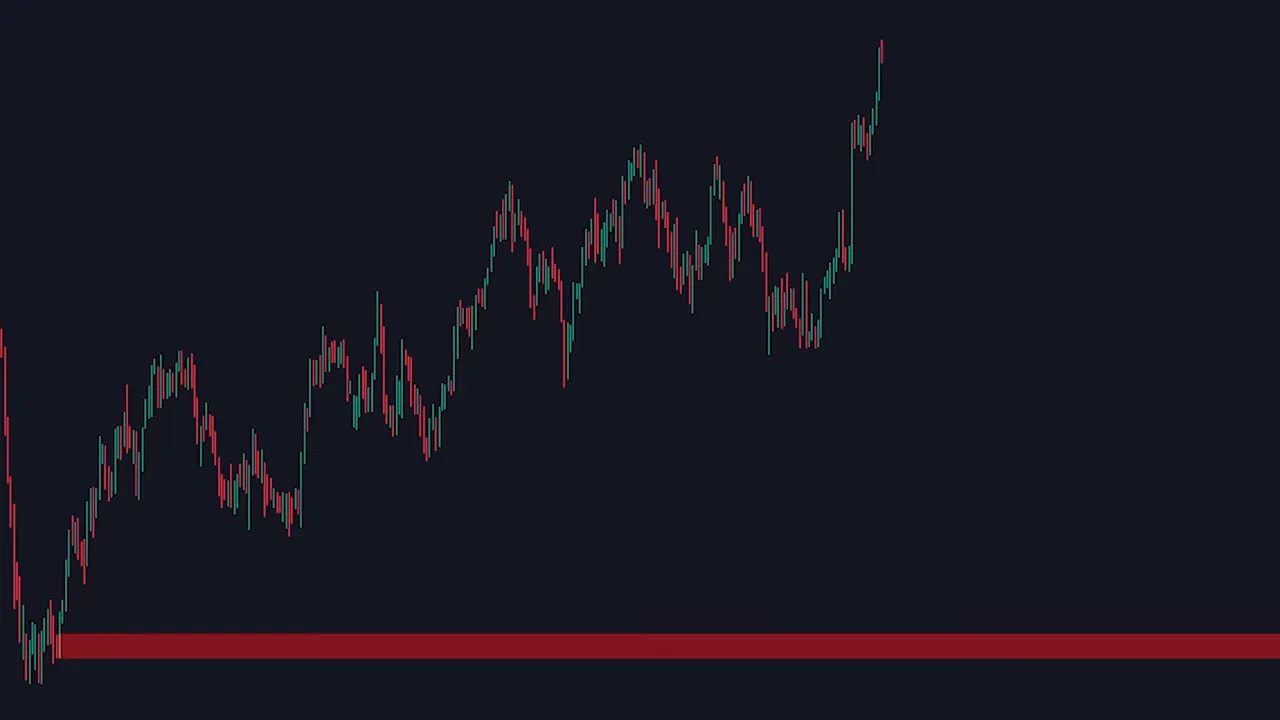
Live trade example — what this looks like in practice
Picture a market that had been trending lower but then showed a break of structure and the beginning of a reversal. On the four hour chart you mark the demand zone. Instead of entering immediately when price touches that zone, you drop to the one hour and find a smaller demand candle inside the larger rectangle. Entering at that refined one hour zone gave a significantly improved risk-to-reward and a more “sniper” level entry.
Warning: do not over refine
Refining is powerful, but zooming in too far creates problems. If you repeatedly drop from four hour to one hour to 30 to 5, you may produce a tiny micro-zone that price never actually returns to. That makes your setup far more likely to be missed.
Follow the two steps down rule:
- Daily → refine to 4H → refine to 1H.
- 4H → refine to 1H → refine to 30M.
- 30M → refine to 15M → refine to 5M.
Stopping at two lower timeframes keeps entries realistic and prevents over-optimization that costs you opportunities.
Applying zone refinement to crypto and multi-chain markets
Zone refinement works across asset classes. Crypto markets often move faster and with higher volatility, so the discipline of using a higher timeframe to identify structural zones and then refining down one or two steps can be especially valuable.
If you trade multiple blockchains or shorter time windows, a reliable way to spot consistent entry areas is to combine the zone refinement method with market-wide signals that highlight trending tokens, liquidity clusters, or order flow imbalances. For traders who prefer a curated view, cryptocurrency trading signals can surface opportunities across chains and save time identifying promising refined zones. These signals are best used as a complement to your own zone work — think of them as a heatmap pointing you where to apply the two-steps-down refinement.
Checklist before you pull the trigger
- Did you start from a higher timeframe and identify the correct supply or demand candle?
- Did you refine only two steps down from that starting timeframe?
- Is your stop defined below the refined zone, not below the large zone?
- Is your take profit still based on the same structural target (recent high/low) used on the higher timeframe?
- Have you checked higher-timeframe context to avoid trading into obvious resistance or fundamental news?
Final thoughts
Zone refinement is one of those elegant, low-friction tweaks that compounds powerfully. You are not changing your strategy or chasing a magical indicator. You are simply choosing better entry precision and better stops. Over time that leads to significantly better profitability because the math starts to work for you.
Try it on a demo account, log the difference in risk-to-reward, and notice how your win size and drawdowns change. The improvement is often immediate and consistent.
FAQ
What exactly is a supply or demand zone?
A supply zone is the candle or cluster of candles that started a strong move down. A demand zone is the candle or cluster of candles that started a strong move up. Mark them from low wick to high wick and treat them as areas where institutional orders likely originated.
How many timeframes should I drop when refining?
Use the two steps down rule. From your starting timeframe, drop at most two timeframes lower to refine the zone. This avoids over refining while still improving entry quality.
Will refining always improve my risk-to-reward?
Not always, but most of the time it will. Refinement tightens your stop and often improves entry price. However, market context and volatility can affect outcomes, so track results and adapt. Never refine so much that you miss realistic returns.
Can I use this method for crypto day trading?
Yes. Crypto often benefits from this approach because of its volatility. Use higher timeframe structure and then refine down one or two steps. For traders who want additional help monitoring many chains, cryptocurrency trading signals can point you to active opportunities worth refining.
What’s a practical way to test this idea?
Backtest a set of setups where you enter at the higher timeframe zone and track the risk-to-reward. Then backtest the exact same setups with zone refinement applied. Compare win rate, average win, average loss, and risk-to-reward. Demo trade it in real time before deploying capital.
Closing
Better entries are usually the path to better profits. Zone refinement is a small habit with big impact. Keep entries realistic, follow the two steps down rule, and combine refinement with sound position sizing. If you trade across chains or want extra market scanning across crypto assets, consider signals as an efficiency layer that helps you find the most promising zones faster.
