


Table of Contents
- Outline
- Why entries matter (and what they do for your risk-to-reward)
- The two entry styles: Risk Entry and Confirmation Entry
- How to execute a Risk Entry — step by step
- How to execute a Confirmation Entry — step by step
- Backtesting and tools that speed up learning
- Applying these entries to crypto and other markets
- Risk management and mindset
- Practical checklist before every entry
- FAQ
- Final thoughts
Outline
- Why entries matter and the trade-off between risk and reward
- The two entry styles: Risk Entry and Confirmation Entry
- Step-by-step execution with live examples
- Tools, backtesting, and applying this to crypto
- Simple checklist to use on every setup
- FAQ
Why entries matter (and what they do for your risk-to-reward)
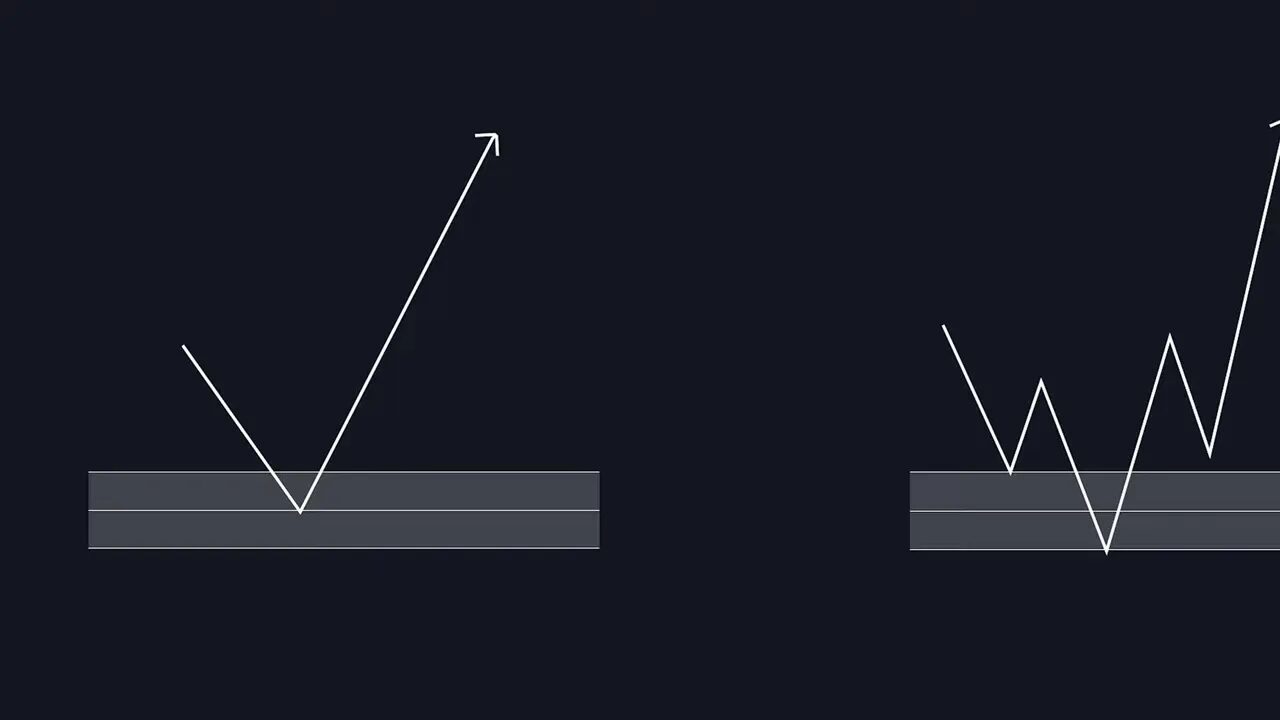
Entries are not the entire game, but they are one of the highest-leverage parts of it. The right entry gives you a tighter stop loss, a larger profit target, and a much better risk-to-reward. That changes everything: one good trade can cover many losers, and your account becomes more forgiving during drawdowns.
Good entries come from two things: identifying high-interest areas on the chart (supply and demand zones or imbalances) and picking the moment within those areas where the odds favor you. The techniques below do exactly that while keeping the approach repeatable and simple.
The two entry styles: Risk Entry and Confirmation Entry
There are two consistent ways to enter trades that I use depending on how aggressive I want to be.
Risk Entry
This is the slightly riskier option. You mark high-interest supply or demand zones on a higher timeframe like 1 hour or daily, then place buyer-sell limits inside those zones. The payoff is a very tight stop and a huge risk-to-reward because you are buying or selling very close to the ultimate low or high.
Pros: massive R:R and tight stops. Cons: higher chance of being stopped out and more patience required because you will take more losses in the short term.
Confirmation Entry
This is the safer option. You still use the same higher-timeframe zones, but you zoom into a lower timeframe to get a break of structure before you enter. That second agreement between timeframes raises the win rate, although you often buy a little higher (or sell a little lower) and therefore accept a smaller R:R.
Pros: higher win rate and fewer false entries. Cons: you will miss some trades and have slightly smaller R:R compared to risk entries.
How to execute a Risk Entry — step by step
- Find a strong supply or demand zone on a higher timeframe (1 hour, 4 hour, daily).
- Note how price reacted to that zone previously: resistance, hesitation, or imbalance.
- Wait for price to return to that zone. Consider entering around the halfway mark of the zone to improve R:R.
- Place stop loss just beyond the zone and take profit at the next major structure (support or resistance).
Example trade: a short on GBPUSD on the 1 hour timeframe. The market was making lower lows and showed a bearish break of structure. I marked a resistance zone and waited for price to return to the halfway point of that zone before entering the short. Stop loss was placed above the zone and the take profit at the next major support.
Waiting for the halfway mark tightened the risk and created an almost 15:1 risk-to-reward on that setup. That means one win can cover up to 15 losses. It worked out as planned in this case and produced a large winner.
How to execute a Confirmation Entry — step by step
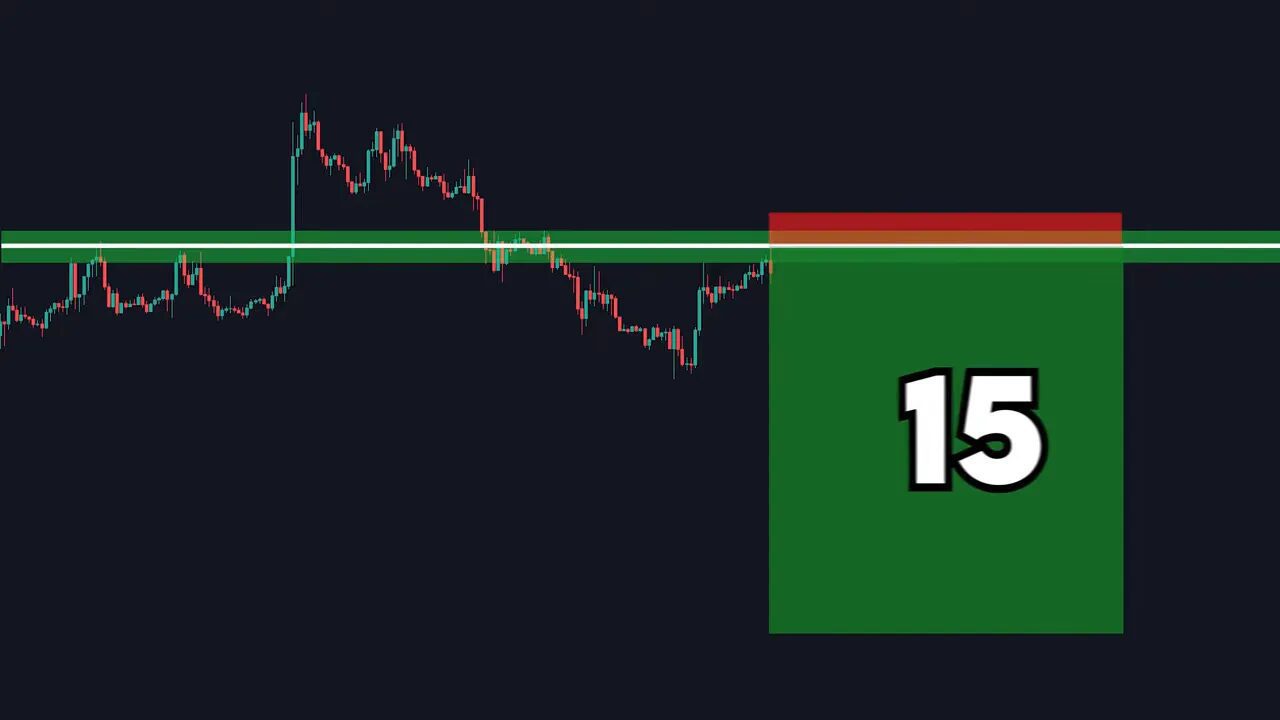
- Mark your higher-timeframe supply or demand zone (for example 15 minute or 1 hour).
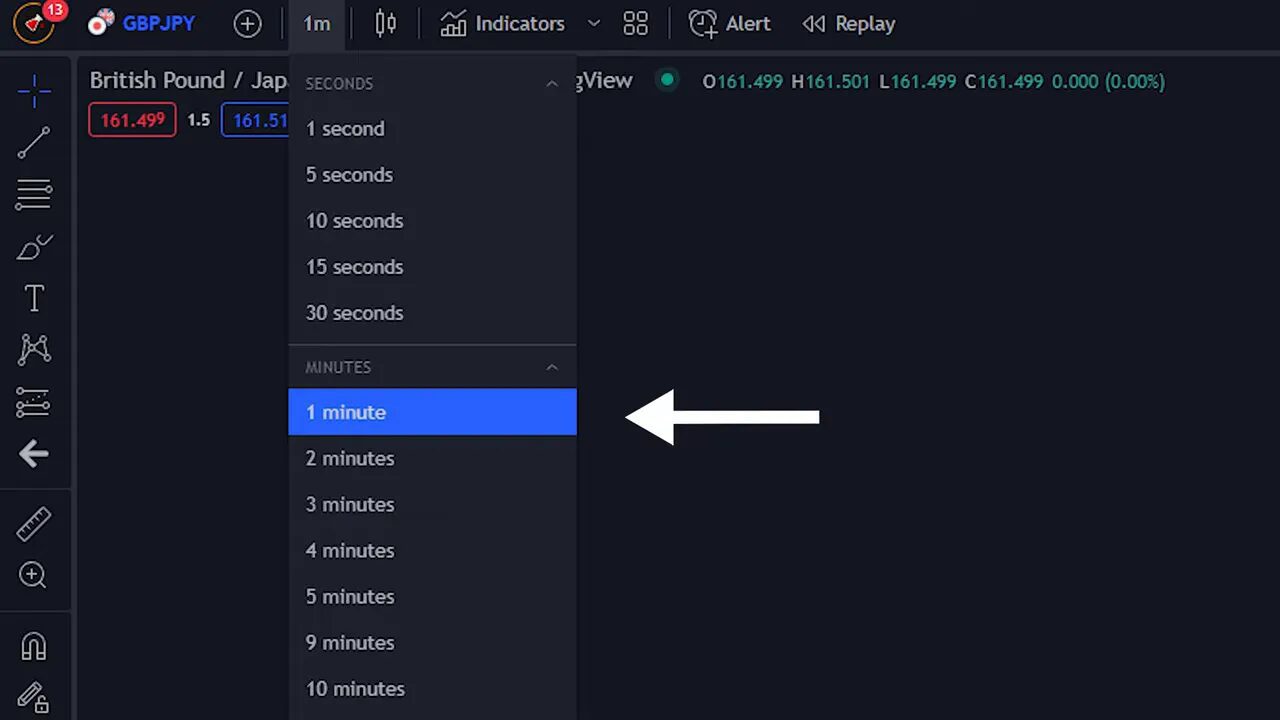
- When price returns to the zone, zoom into a lower timeframe (1 minute to 5 minute) and look for a break of structure in the direction you want to trade.
- Identify a clean area to enter such as a fair value gap or a pullback to a swing.
- Place stop loss above the recent high (for shorts) or below the recent low (for longs). Set take profit at the next structural target.
Example trade: GBPJPY on the 15 minute. After a downward break of structure, price returned to a resistance zone. I zoomed into the 1 minute to confirm a reversal from higher highs and higher lows to lower highs and lower lows. The entry was a fair value gap on the 1 minute and stop was placed above the recent high. The result: a safer entry with higher probability.
Extra confirmation: the secondary breakdown
For even more conviction, wait for a secondary breakdown (a second break of structure) on the lower timeframe. Entering on the secondary breakdown often allows you to place your stop at the recent swing high and enter with stronger trend alignment. This reduces the chance of a false flip but may move your entry slightly further away from the ultimate low or high.
Backtesting and tools that speed up learning
Backtesting is the fastest way to know whether a method works for you. Coding strategies is time consuming, but there are tools that come prebuilt with many indicators and allow you to test combinations without writing code.
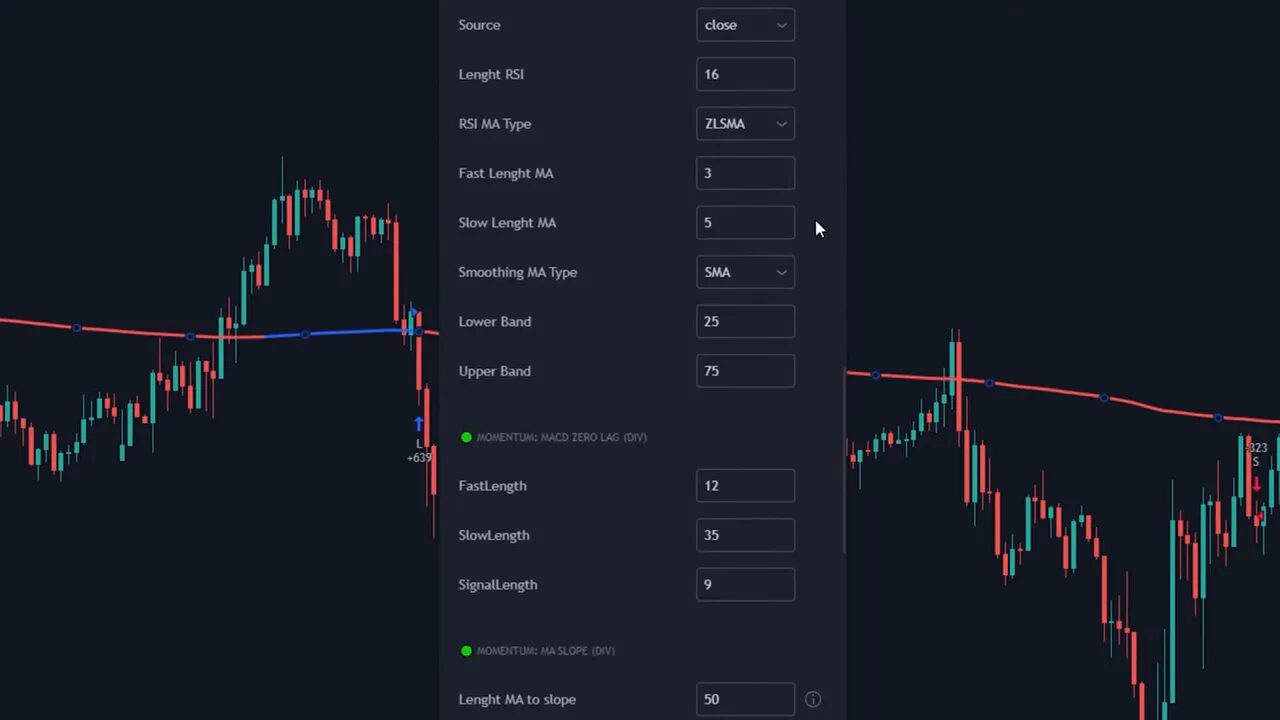
One approach is to test a smoothing moving average filter plus a momentum divergence condition, take profits at pivots, and use a consistent stop offset. The strategy tester will show entry and exit points so you can iterate quickly. Learn the edge, then scale it slowly with strong risk controls.
Applying these entries to crypto and other markets
The same entry principles work across Forex, stocks, and crypto. Crypto markets can be more volatile and often show larger imbalances and sharper fair value gaps, so the confirmation entry can be especially valuable there.
If you trade multiple crypto pairs and want timely setups across different blockchains, combining these entry techniques with a provider-is-reliable” target=”_blank”>reliable signal service can help you stay on top of opportunities without staring at every chart. Consider a provider that labels high-interest zones, flags breaks of structure, and highlights potential fair value gaps—this can be a practical complement to manual analysis when scanning many tokens. A subtle and effective approach is to use the best crypto trading signals to surface high-probability setups, then apply either the risk entry or the confirmation entry process to execute them.
Risk management and mindset
Entries matter, but risk management decides survival. Use fixed position sizing, respect your stops, and never increase size to “recover” losses. With setups that offer 5:1 or 15:1 risk-to-reward, a disciplined approach allows you to endure short losing streaks and still be profitable.
Practical checklist before every entry
- Higher-timeframe zone identified and marked
- Trend or break of structure confirmed on relevant timeframes
- Preferred entry point chosen (halfway mark for risk entry or lower-timeframe confirmation)
- Stop loss placed beyond structural invalidation point
- Take profit at the next structural target
- Position size calculated to limit risk to a predetermined percentage of the account
FAQ
What is the main difference between a risk entry and a confirmation entry?
Risk entries use higher-timeframe zones and enter near the ultimate low or high for a huge R:R with a tighter stop. Confirmation entries wait for a lower-timeframe break of structure before entering, which increases win rate but usually lowers R:R and can cause missed opportunities.
When should I prefer a risk entry over a confirmation entry?
Use a risk entry when the higher-timeframe zone is very strong and you are comfortable accepting more frequent stop outs in exchange for massive R:R. If you need a higher win rate and are trading more volatile instruments like crypto, prefer confirmation entries.
How do I place stop loss and take profit for each entry type?
For risk entries place the stop beyond the zone boundary. For confirmation entries place the stop above the recent swing high (for shorts) or below the recent swing low (for longs), or tighten it to the pivot after a secondary breakdown. Take profit should be the next major structural level.
What is a fair value gap and how is it used for entries?
A fair value gap is a price imbalance created when price moves quickly and leaves a gap between candles. Entering into a fair value gap on a lower timeframe often gives a precise point to enter after a break of structure, improving the chance of a clean fill and clearer stop placement.
Can these entry techniques be used across markets?
Yes. The supply and demand zone identification, break of structure, and fair value gap concepts apply to Forex, stocks, and crypto. Adjust timeframe and position sizing to match the volatility and liquidity of the market you trade.
Final thoughts
Redefining how you enter trades—either by taking calculated risk entries or waiting for confirmation on lower timeframes—can instantly improve the quality of your setups. Use backtesting to validate the approach, practice strict risk management, and adapt the method to the markets you trade. A single disciplined, high R:R trade can change your return profile over many trades.
Pick one entry style to test for a few dozen trades, record outcomes, and refine your rules. Over time you will know which approach fits your psychology and edge best.
