

If you’ve been asking “how to buy kaspa coin” and have been frustrated that Kaspa isn’t listed on the major tier-one exchanges you use every day, this guide is for you. In this post I’ll walk you through a step-by-step method I personally use to buy Kaspa without needing KYC or a second-tier centralized exchange account. This walkthrough covers wallets, choosing the right network, using a swap service, safety tips, common pitfalls, and troubleshooting.
Table of Contents
- Why this guide? And a quick note on Kaspa
- Overview: How to buy kaspa coin (the quick version)
- Step 1 — Prepare your Kaspa wallet (don’t skip this)
- Step 2 — Fund your Coinbase account and convert to USDC
- Step 3 — Choose the correct chain (why Avalanche is often chosen)
- Step 4 — Use a non-custodial swap service (SimpleSwap example)
- Step 5 — Send USDC from Coinbase to the swap deposit address
- Step 6 — Wait for the swap and receive Kaspa
- Fees, slippage, and what to expect
- Security and best practices
- Troubleshooting common problems
- Alternatives and other ways to buy Kaspa
- Detailed step-by-step checklist
- FAQ
- Final thoughts
Why this guide? And a quick note on Kaspa
Recently, a crypto trading signal for Kaspa was given on Bull Crypto Signals but it is not available on many big exchanges yet. That’s why a lot of folks are asking how to buy kaspa coin without signing up for sketchy platforms. The method I show here uses a mainstream custodial account (Coinbase) to convert USD to a stablecoin, then sends that stablecoin over a low-fee chain to a non-custodial swap service that will deliver Kaspa to your wallet.
Before we dive into step-by-step instructions, a few rapid-fire facts and warnings:
- This is not financial advice. Cryptocurrency is volatile—do your own research.
- Always double-check addresses and networks before sending funds.
- Use a hardware wallet to store Kaspa long term. Don’t leave funds on random apps or your main desktop. More on wallets below.
Overview: How to buy kaspa coin (the quick version)
- Create or use a Coinbase account (or other major exchange) and deposit USD.
- Convert USD to USDC (a stablecoin) inside Coinbase.
- Use a swap service that supports Kaspa (e.g., SimpleSwap) and choose a low-fee chain to send USDC from (Avalanche is a common choice).
- Provide your Kaspa wallet address to the swap service as the recipient.
- Send USDC from Coinbase on the chosen chain to the swap’s deposit address.
- Wait for the swap to complete and receive Kaspa in your wallet.
- Transfer Kaspa to your hardware wallet if holding long-term.
That’s the high-level flow. Below I break each step into detail, plus screenshots and pro tips so you avoid common mistakes.
Step 1 — Prepare your Kaspa wallet (don’t skip this)
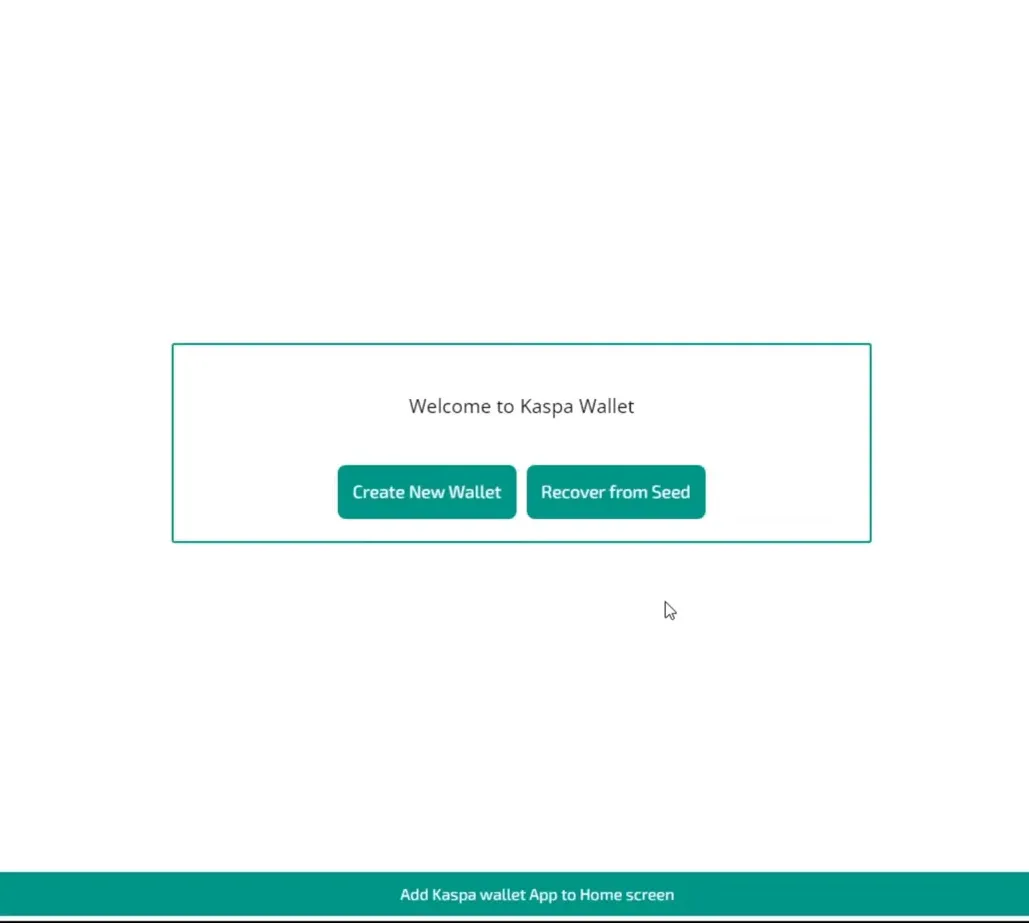
Before you buy any Kaspa you need a destination address. There are two main wallet types to consider:
- Hot wallet (desktop/mobile): Kaspa has an official wallet you can download. It’s free and convenient, but it’s a hot wallet—connected to the internet. If you’re new, please don’t run this on your main workstation. Use a separate machine or a VM, and always back up your seed phrase securely. The convenience is great for quick trading, but it’s riskier for long-term storage.
- Hardware wallet (recommended for long-term holding): A hardware wallet is the safest place to keep significant crypto. At the time of writing, Tangem was one hardware wallet supporting Kaspa. If you plan to hold Kaspa, get a hardware wallet you trust and store your seed phrase offline.
Bottom line: pick a wallet first. If you plan to hold beyond short-term speculation, a hardware wallet is strongly recommended. Once your wallet is set up, copy your Kaspa deposit address—this is what you’ll paste into the swap site.
Step 2 — Fund your Coinbase account and convert to USDC
For this example I use Coinbase because it’s a common and trusted on-ramp for many users in the U.S. The goal here is to get USDC, a stablecoin that’s widely supported on many chains and easy to move around.
How to do it:
- Deposit USD to your Coinbase account via bank transfer, debit card, or other supported method.
- Find your USD wallet inside Coinbase and click the three-dot menu next to it.
- Select “Convert” and choose USDC. Enter the amount you want to convert (for example, $100) and confirm. Coinbase typically doesn’t charge a fee for converting USD to USDC within your account.
Now you have USDC sitting in Coinbase ready to send. We’ll use that to fund a swap to Kaspa.
Step 3 — Choose the correct chain (why Avalanche is often chosen)
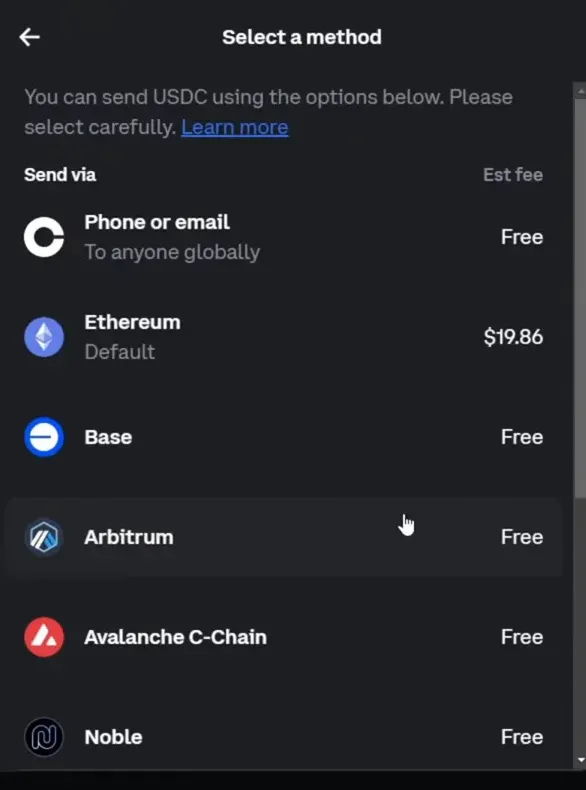
When you hit “send” on Coinbase, you’re asked to choose a network. USDC exists on many blockchains—Ethereum, Solana, Avalanche, Polygon, Arbitrum, Base, and more. Gas fees vary widely by chain.
Example: Ethereum can be expensive—sometimes $10–$30 to move funds, depending on network congestion. In the video example, sending $100 USDC on Ethereum would have cost an additional ~$19 in fees. That’s why picking a low-fee chain like Avalanche can make a big difference.
Important: Make sure the swap service accepts USDC on the chain you select. If the swap service expects USDC on Avalanche and you send USDC on Ethereum, the funds can be lost.
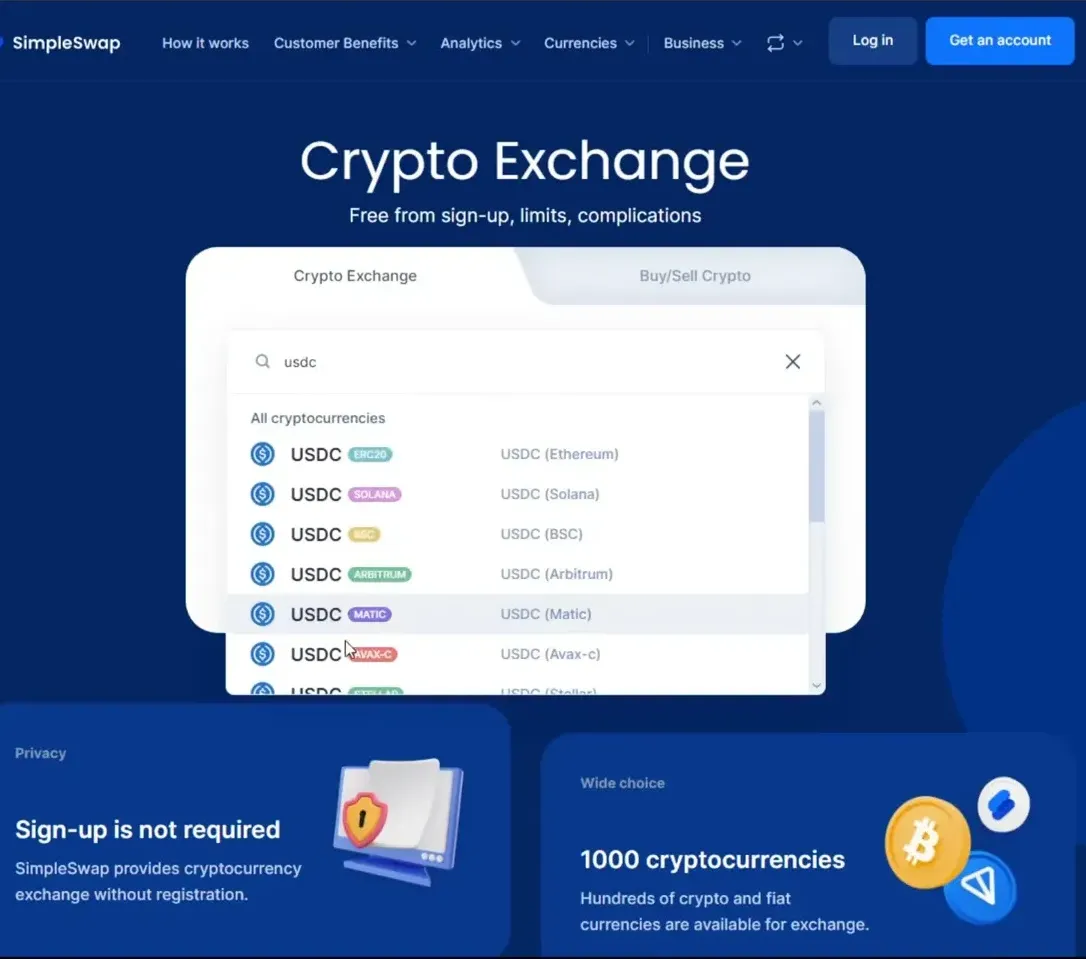
Step 4 — Use a non-custodial swap service (SimpleSwap example)
There are multiple swap services that will accept stablecoins and return Kaspa without KYC. SimpleSwap is one example I use. The advantages:
- No KYC or account creation required.
- Supports many chains and coins.
- Quick swaps for stablecoins, often complete within minutes.
How to use the swap service:
- Open the swap site and select what you send (USDC) and the chain you’ll use (e.g., USDC AVAX for Avalanche).
- Enter the amount you want to swap (e.g., $100).
- Select the coin you want to receive: Kaspa. The site will show an estimate of how much Kaspa you’ll get. There is a built-in fee and a small swap spread—expect some difference between market price and final amount.
- Click “Exchange” or “Create exchange.” The swap site will ask for your Kaspa deposit address—paste the address from your Kaspa wallet here.
- The swap site will generate a deposit address (this is where you send your USDC). It also usually provides a QR code if you’re sending from a phone.
Pro tip: before sending the full amount, consider sending a small test amount ($5–$10) to make sure everything is configured correctly—especially if it’s your first time using that swap service or chain. This can save you from catastrophic mistakes.
Step 5 — Send USDC from Coinbase to the swap deposit address
Back in Coinbase, open your USDC wallet, click “Send,” paste the deposit address from the swap site, and select the same network (Avalanche in our example). Coinbase will warn you if you’re using a different network than expected—pay attention to these prompts.
Confirm the address and network one last time. Many failures happen because people choose the wrong network or paste the wrong address. After confirmation, you may need to complete two-factor authentication (2FA). Then submit the transaction.
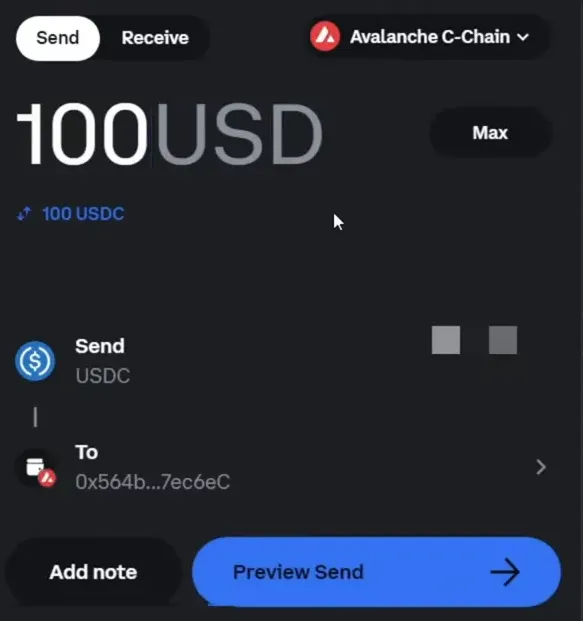
On Avalanche, fees are typically very low, so it’s common to send nearly the whole stablecoin amount to the swap. The swap service will then detect the deposit and start the exchange process.
Step 6 — Wait for the swap and receive Kaspa
Stablecoin deposits like USDC are usually confirmed fast. In my experience, USDC on chains like Avalanche reaches the swap within a couple of minutes. SimpleSwap (or similar services) then completes the exchange and sends Kaspa to your wallet address.
Timeframes to expect:
- USDC/USDT deposits: usually 1–5 minutes.
- Kaspa delivery: often another 1–5 minutes.
- Bitcoin or other chains: can take much longer—hours in some cases.
When the transaction completes, the swap service will show “Finished successfully” and you’ll see the Kaspa balance in your wallet. In the example, swapping $100 USDC yielded around ~571 Kaspa after fees and price movement; final numbers depend on market price and swap spread.
Fees, slippage, and what to expect
There are a few costs to be aware of when learning how to buy kaspa coin with this method:
- Swap fee / spread: Non-custodial swap services charge a fee and there’s small slippage between the time they buy and swap. In the example, the swap fee ended up costing roughly $9 on a $100 transaction, which is significant. Expect higher percentage fees on smaller orders.
- Network fees: Sending USDC on Avalanche or Polygon is cheap; Ethereum can be expensive. Choose your chain wisely.
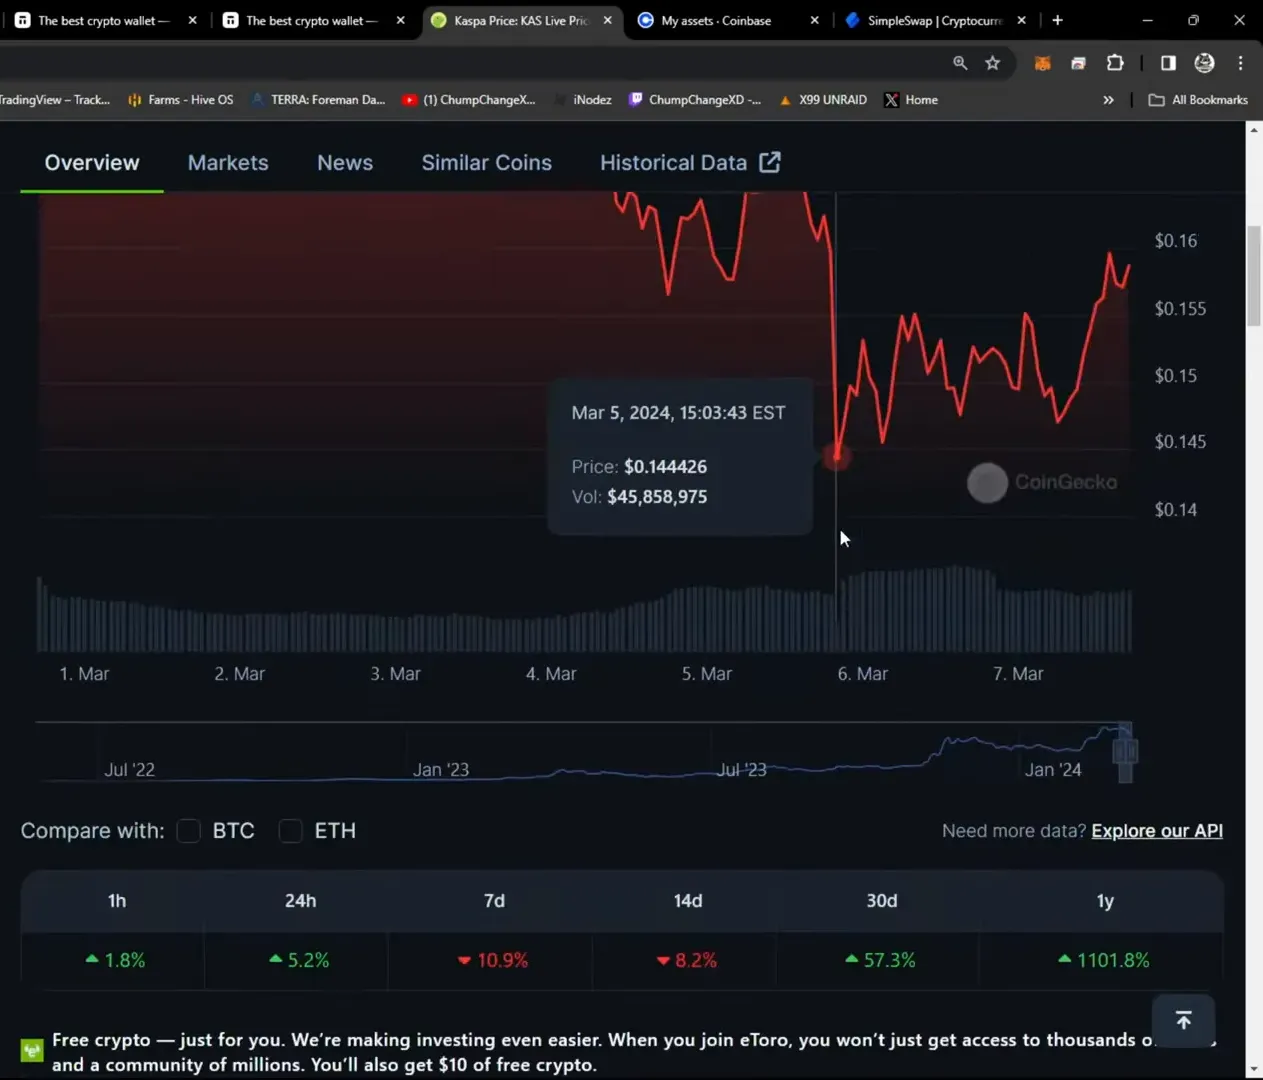
- Price movement: Crypto prices can move quickly. The Kaspa price might tick up between the time you initiate the swap and when the swap executes, affecting the final amount you receive.
These costs mean that for very small purchases, fees can be a large percentage of your order. If you’re buying significant amounts, percentage fees get relatively smaller, but still factor them into your decision.
Security and best practices
Protecting your funds should be your top priority when you learn how to buy kaspa coin. Here are practical safety steps I always follow and recommend:
- Use a hardware wallet for long-term storage: Once you receive Kaspa in a hot wallet, move larger amounts to a hardware wallet.
- Never store your seed phrase online: Write it down and store it in a secure, offline location.
- Double-check addresses and networks: One paste error can cost you everything. Always confirm the full address prefix and suffix.
- Don’t download wallet software on your main work PC: If you must use a desktop hot wallet, consider a separate machine or a virtual machine (VM) to minimize risk from malware.
- Test with a small amount first: When using a new swap service or chain, send a small test transaction.
- Keep Coinbase and other accounts secured with 2FA: Use an auth app or hardware security key—don’t rely on SMS only.
Troubleshooting common problems
Even with precautions, things can occasionally go wrong. Here’s how to handle common issues:
- Swap not received or stuck: Check the deposit transaction on the sending chain explorer (Avalanche Explorer, etc.) to confirm success. If confirmed, contact the swap service support with your transaction ID and details. Keep calm—many swaps complete after a short delay.
- Wrong network used: If you sent USDC on the wrong network to the swap, funds may be lost. Contact both the sending wallet/exchange and the swap service immediately. Recovery is often difficult and not guaranteed.
- Funds missing from wallet: Confirm the Kaspa address you provided. Check your wallet’s sync status (some wallets need to fully sync to show balance). If using a hardware wallet, ensure you are viewing the correct account.
- Swap fees seem excessive: Smaller orders can have higher relative fees. Consider pooling a larger amount or using alternative on-ramps if you plan to buy frequently.
Alternatives and other ways to buy Kaspa
There are other methods to acquire Kaspa that might suit different users:
- Second-tier centralized exchanges: Some smaller exchanges list Kaspa. These often require KYC and carry custodial risk.
- P2P trades: Peer-to-peer trades are another option but require trust and careful escrow arrangements.
- Mining: Kaspa is mineable; if you run mining hardware, you can mine and receive Kaspa directly. That’s more involved but is another way to obtain coins.
This guide focuses on a quick, KYC-free route using a mainstream on-ramp and a non-custodial swap service—accessible to most beginners and relatively low-risk when you follow the safety steps above.
Detailed step-by-step checklist
- Create a Kaspa wallet and copy the deposit address (or set up your hardware wallet).
- Deposit USD into Coinbase and convert to USDC.
- On the swap site, choose «USDC» and the chain you’ll use (e.g., AVAX).
- Enter how much USDC you want to swap and select Kaspa as the destination coin.
- Paste your Kaspa deposit address into the swap site and click «Create exchange.»
- Copy the deposit address provided by the swap site (or scan the QR code if on mobile).
- In Coinbase, send USDC to the swap deposit address, making sure the network matches (AVAX).
- Confirm 2FA and complete the send.
- Wait for the swap to complete and verify Kaspa arrived in your wallet.
- Move long-term holdings to a hardware wallet when possible.
FAQ
Q: Is this method legal?
A: Generally yes—using Coinbase to convert USD to USDC and a swap service to buy Kaspa is legal in most jurisdictions. However, local regulations vary. If you’re unsure about rules in your country or state, consult a local expert.
Q: How long does a swap usually take?
A: For USDC on Avalanche to Kaspa via a swap service, expect a few minutes to under 10 minutes in most cases. Complex chains or congestion can increase that time.
Q: Why not use Ethereum to send USDC?
A: Ethereum gas fees can be high. For a $100 swap, paying $15–$25 in gas defeats the purpose. Choose a low-fee chain like Avalanche, Polygon, or Arbitrum when supported by the swap service.
Q: Are there risks with using a swap service like SimpleSwap?
A: Yes. Risks include fee hiddenness, swap service downtime, and rare transaction delays. Always check small test amounts first and use reputable services. If you need absolute custody, consider exchanges that let you withdraw directly to a hardware wallet after purchase.
Q: Can I buy Kaspa directly on Coinbase?
A: As of now, major exchanges like Coinbase don’t list Kaspa for direct purchase. That’s why the swap route is useful. Keep an eye on exchange listings—things change over time.
Q: How much should I buy at once?
A: That depends on your risk tolerance and the fee structure. Because swap fees can be a significant percentage on small buys, many people choose to buy larger chunks less frequently. But never invest more than you can afford to lose.
Final thoughts
If your question is how to buy kaspa coin without dealing with sketchy exchanges or KYC bureaucracy, the method outlined here is simple and repeatable: convert USD to USDC on a mainstream exchange like Coinbase, send USDC on a low-fee chain to a swap service that supports Kaspa, and receive your Kaspa in a secure wallet. It’s fast, avoids heavy KYC, and is accessible to beginners. But remember: safety first. Use a hardware wallet for long-term storage, double-check addresses and networks, and consider testing with small amounts until you’re comfortable.
I hope this guide helps you confidently acquire Kaspa. If you found this useful, consider practicing the steps with a small test amount and building up from there. Good luck, stay safe, and happy swapping.
Disclaimer: This is NOT financial advice. Cryptocurrency is volatile and carries risk. Do your own research before investing.
