

Institutions trade differently than retail traders. They move large piles of orders, and the market often reacts sharply when those piles clear. I built an indicator that highlights those exact spots—order blocks—so you can trade with the flow of big money instead of fighting it. It is simple to use, works across markets with volume, and has been one of the best-performing tools I have made.
Table of Contents
- What an Order Block Actually Is
- Where This Indicator Fits In
- How to Set It Up
- Simple Entry and Exit Rules
- Confirmation: How to Avoid False Signals
- When Not to Trade an Order Block
- Live Trade Examples
- Combine Order Blocks with Other Analysis
- Quick Checklist Before You Enter
- FAQ
What an Order Block Actually Is
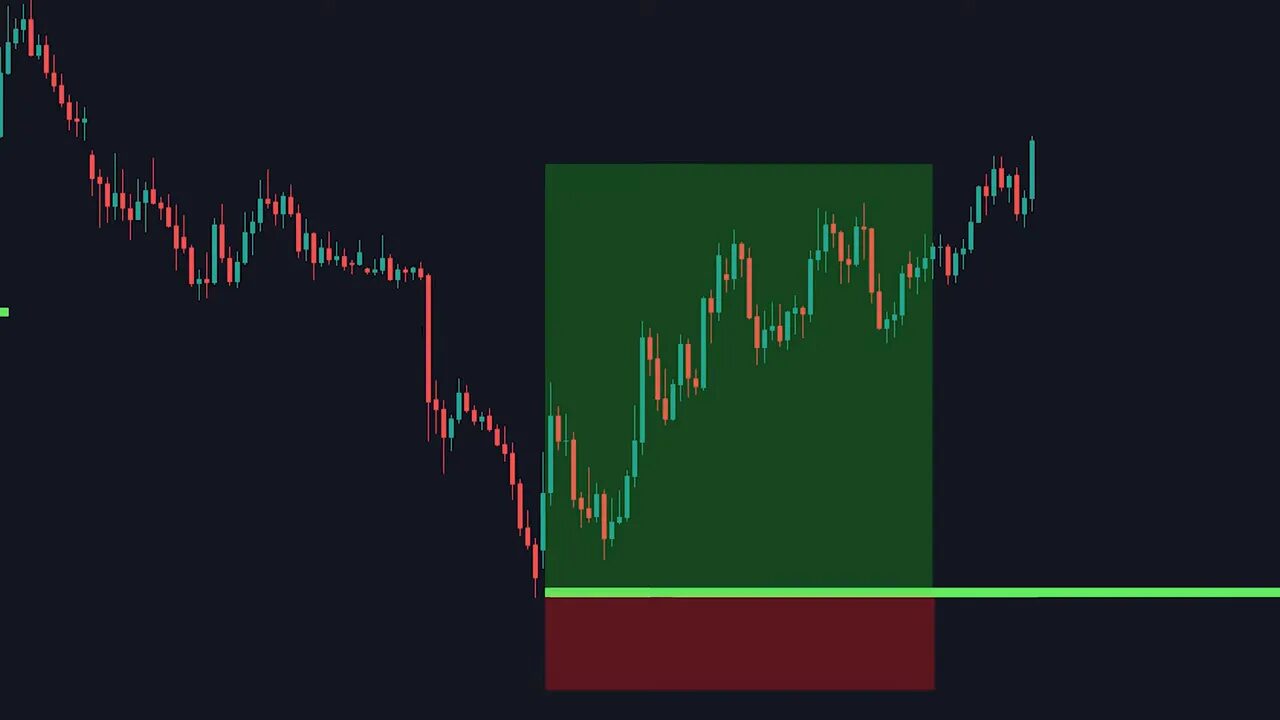
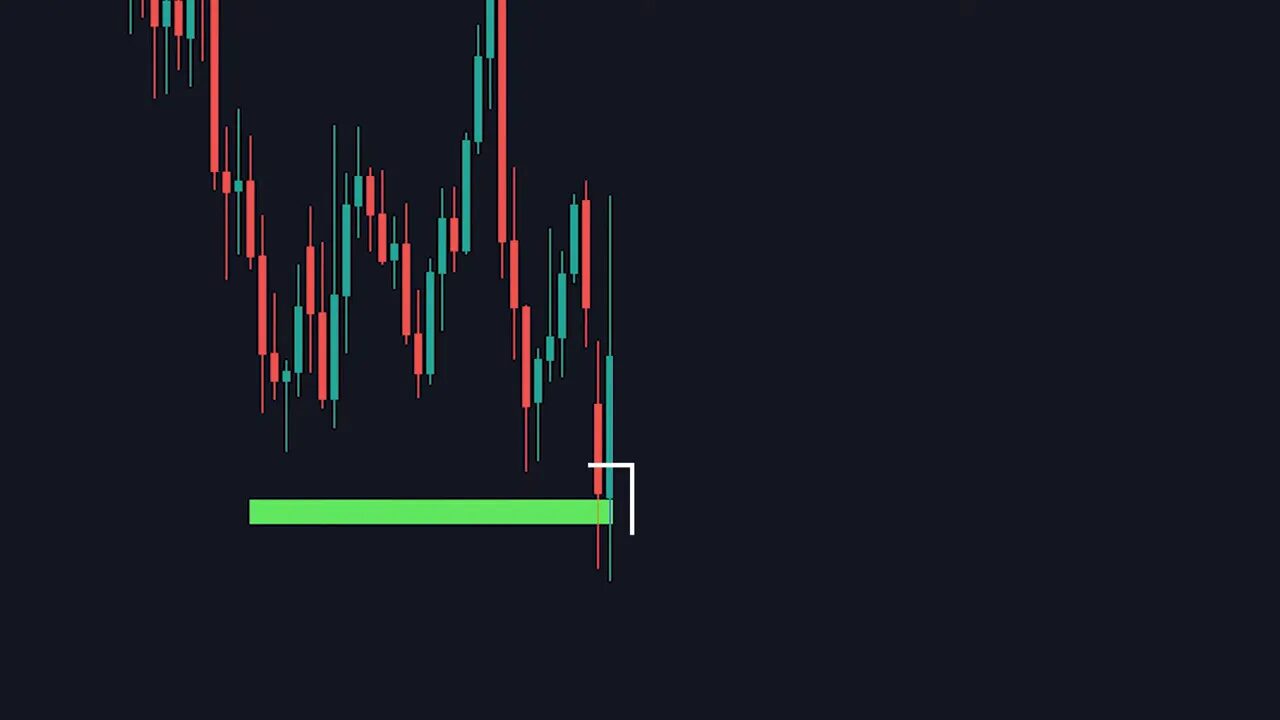
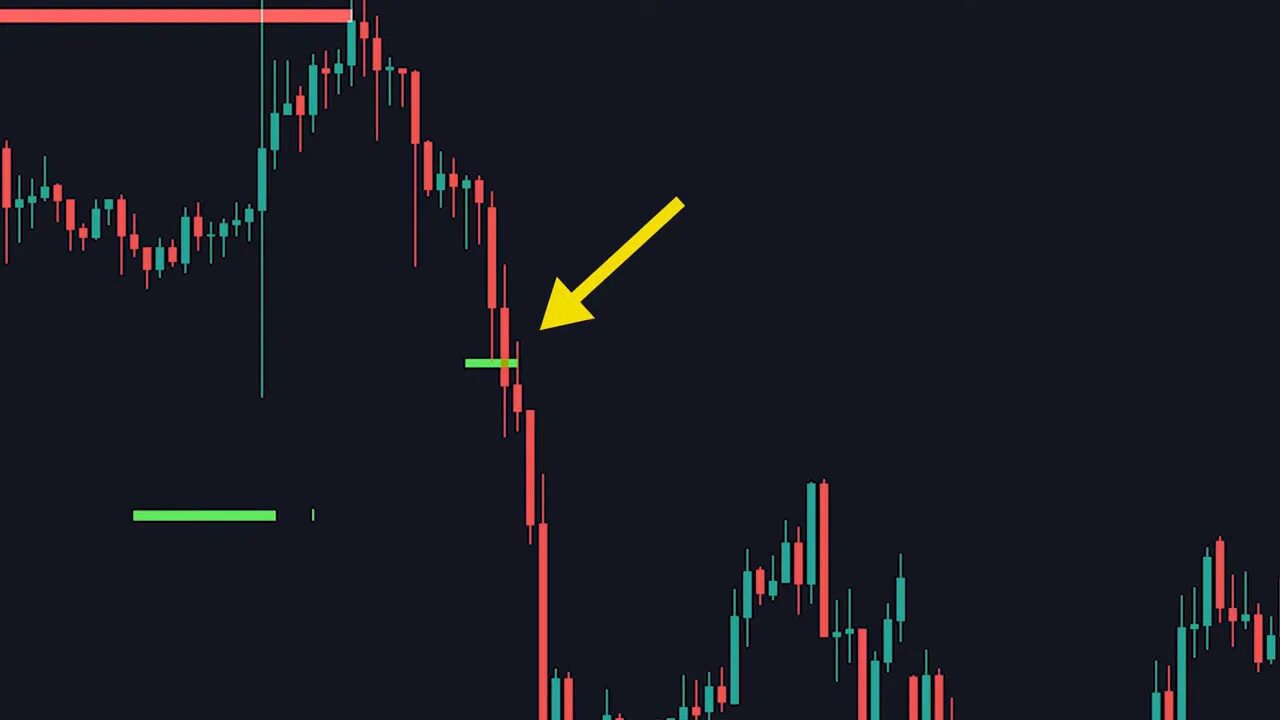
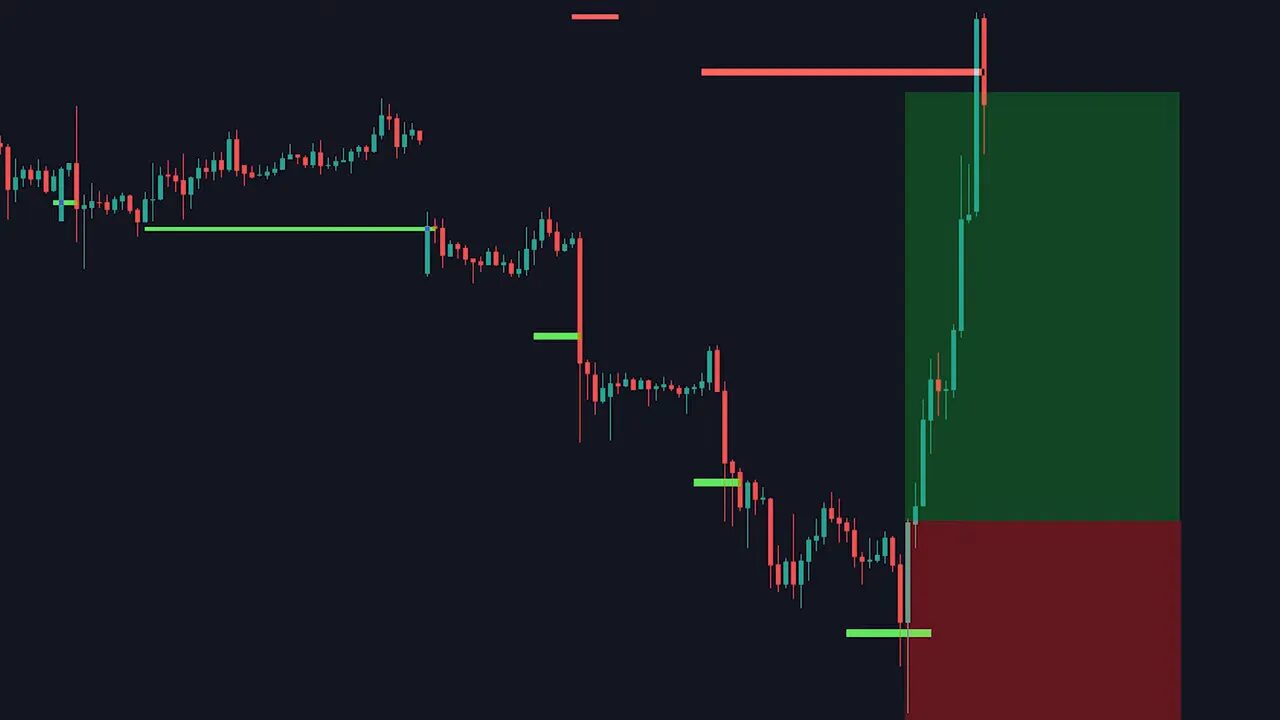
An order block marks a market area where banks and institutions likely accumulated or distributed positions. Think of these zones as footprints left by whales. When price returns to an order block, the market often pauses, reverses, or makes a sharp move after the block completes. That’s the edge: trading around these institutional footprints improves your odds because you are aligning with large liquidity flows.
Where This Indicator Fits In
This indicator scans price action and draws colored rectangles on the chart: green for bullish order blocks and red for bearish order blocks. It is designed to work on stocks, forex, and crypto—any market with sufficient volume. In my testing the most consistent results came on the one hour timeframe, though it is usable on any timeframe.
How to Set It Up
- Install the indicator on your charting platform.
- Open the indicator settings and enable order blocks.
- Use the one hour timeframe for best balance between noise and signal, or adjust to your trading style.
Simple Entry and Exit Rules
The basic trade plan is intentionally straightforward:
- For longs: enter when price comes down to a green order block.
- For shorts: enter when price comes up to a red order block.
- Stop loss: place below the green block for longs, above the red block for shorts.
- Take profit: target the recent swing high for longs, recent swing low for shorts.
When the rules align you can take very clean, high-probability trades. But like any tool, order blocks are not perfect—price will sometimes slice through a block. That is where confirmation and discipline come in.
Confirmation: How to Avoid False Signals
Never enter immediately simply because a block is present. Wait for confirmation. My checklist before entering:
- Slowing price action: look for wicks that show buyers absorbing selling (for green blocks) or sellers absorbing buying (for red blocks).
- A confirmation candle: a candle that closes in the expected direction right at the block. For a long, a green candle closing at the block. For a short, a red candle closing at the block.
- Prefer pattern confirmation: bullish engulfing, hammer, or other clear reversal candles further increase probability.
Waiting for the closing confirmation candle prevents entering on weak bounces and helps avoid those scenarios where price slices through the block like cheese.
When Not to Trade an Order Block
There are three common reasons to ignore an order block:
- Strong breakthrough: if price already broke through the block with strong momentum, do not use it.
- Very small blocks: tiny blocks often lack enough liquidity to produce a reliable reaction.
- Previously touched blocks: if the block has already been tested and traded off, its edge is reduced on subsequent touches.
Live Trade Examples
Here are typical live scenarios I follow:
- Price descends to a green block, leaves a long lower wick showing buying interest, then a green confirmation candle closes at the block. Enter at close, place stop under the candle low, and target the recent swing high.
- Price rallies into a red block, shows an upper wick and selling pressure, then a red candle closes at the block. Enter at the close with stop above the block and target the recent swing low.
Discipline wins here. If a confirmation candle never appears, skip the trade. In examples where I ignored weak signals, price later broke the block—avoid those traps and you dodge a lot of losses.
Combine Order Blocks with Other Analysis
The indicator is powerful on its own, but it becomes even stronger combined with trend analysis, support and resistance, and pattern recognition. For crypto traders, pairing order block signals with on-chain data or curated crypto signals that track cross-chain momentum can highlight exceptional trade opportunities. Crypto markets move fast and across multiple blockchains; using order blocks to find price levels plus crypto signals for timing can give a meaningful edge.
Risk management remains crucial. Use sensible position sizing and stop placement. Treat the indicator as a high-probability tool, not a guarantee.
Quick Checklist Before You Enter
- Is the block on a timeframe that matches your trade horizon? Prefer one hour for intraday swing trades.
- Did price show slowing action at the block?
- Did a confirmation candle close at the block?
- Is the block sizable and not previously exhausted?
- Is the trade aligned with the broader trend or structural levels?
FAQ
What timeframes work best for order blocks?
The indicator works on any timeframe with sufficient volume, but testing shows the one hour timeframe offers the best balance between noise and reliable signals for most traders.
Can this be used on crypto, forex, and stocks?
Yes. Any market with decent liquidity will show meaningful order blocks. Crypto can be volatile across different blockchains, so combining this indicator with timely crypto signals or on-chain data improves timing and selection.
How should I set stop loss and take profit?
Set stop loss just beyond the order block (or below the confirmation candle low for longs and above the confirmation candle high for shorts). Take profit at the nearest significant swing high or low or scale out across multiple targets.
What if a block gets pierced?
If the block is pierced with strong momentum, treat it as invalid for that setup. Wait for a new block or another confirmation before re-entering. Trading through a broken block often results in losses.
Do order blocks repaint?
Order block detection can update as price unfolds, which is why confirmation rules are essential. Always enter on a closed confirmation candle and avoid chasing freshly drawn blocks that may change.
